Showing posts with label symbols. Show all posts

One Easy Way to Increase Vocabulary on AAC Devices

How do we add vocabulary when a child is physically limited to a few keys on a screen?

In the world of AAC, conflicts and compromises abound. We sacrifice battery life for weight, screen size for portability, budget for specialized access modes. We sacrifice the size of the vocabulary set for the number of buttons a child can access.

When children begin to use an AAC device, motor or cognitive challenges may limit them to just a few words on a screen. How in the world are we going to help them transition smoothly into a larger vocabulary accessed with more—and smaller—keys?

The secret is to use motor automaticity to our advantage.

Let’s step back and take a look a motor automaticity. Motor automaticity is the ability to carry out motor patterns without thinking about the movement. We all do this, all the time.

For example, walking is a skill many of us can do successfully without thinking about. Many of us can even complete other tasks at the same time as walking, such as talking to a friend, carrying objects, or looking for a misplaced coffee cup.

But someone recovering from a brain injury or stroke who has lost that motor automaticity must concentrate hard on the movements needed to walk. All their cognitive energy must focus on moving their legs correctly; carrying on a friendly conversation or looking out for that missing coffee mug is too demanding during the task of walking.

Another example of motor automaticity at work is touch typing. A typist can concentrate on forming words on the page without having to think about which finger to move to spell out the words. Remember this example; we’ll come back to it again.

When kids rely on AAC to communicate, motor automaticity allows them to access symbols on a screen without having to think about movement. This greatly enhances their rate of expression and makes conversation much more accurate and fluid. Kids can focus on the meaning of what they are trying to say rather than the motor mechanics of finding and targeting a symbol on the screen.

Without motor automaticity, locating a target and touching or eye-dwelling on it can be very demanding work. Communication is slow, exhausting, and creates a frustrating number of mis-hits.

We support motor automaticity by keeping buttons in the same location as much as possible. Just as we keep letter keys in a consistent arrangement on a QWERTY keyboard, symbols located in consistent arrangements are easier for kids to retrieve. They can find the symbols and letters they want easily, without having to scan through many keys.

To maximize motor automaticity...

Introduce screens with the end result in mind.

How many buttons on a page will a child be able to access in the future? No one has a crystal ball, so you’re just going to have to make an educated guess based on your child. With semantic compaction vocabulary sets, it’s hard to access a full vocabulary in less than 45 or 60 keys. Category-based pages might allow you to communicate with 30 to 42 keys on a screen, but fewer than that is going to mean a whole lot of tedious page flipping. The more buttons per screen, the fewer hits are needed, whether you are accessing words through categories or semantic compaction.

“But,” you say, “my child can only handle 8 buttons on a screen right now...”

You could offer eight buttons that fill the screen. However, what happens in the future when your child is ready to add more vocabulary? You would have to shrink the buttons and shake up their order to make room for more words or categories. Remember motor automaticity? Your child would have to learn their locations all over again. How discouraging is that?!
How naturally do these 8 buttons...

...become this? (Sono Lexis 9 x 6)
Not very!


Instead, take the screen that is your end goal and hide all buttons except the eight starter words/categories your child is using. He still has access to the same eight selections as the large keys filling the screen. Yes, these buttons will be smaller, but they are surrounded by plenty of null space that won’t activate if he hits it. You might be surprised how fast he can learn to target the smaller button size.
With this end goal in mind (Unity 45, full hit)...

...we start with these few word combinations.


When it is time to add vocabulary, you UN-hide hidden words or categories. They won’t change anything your child has committed to motor memory; they simply begin to fill in void space.

Child begins with these words and category...


...and ends with this 9 x 6 Sono Lexis display over time.


Remember learning to touch type in your keyboarding class? You started with the home row of keys:  asdf jkl;. It wasn’t much; you were limited to words like “fad,” “ask” and “lass.” But after a few days (weeks?), the teacher introduced “e” and “i,” and that opened up a huge new world of words! Now you had command of “alike” and “fleas” and “skidaddle!” The good news is that you didn’t have to relearn where the home row keys were located; they stayed consistent while new keys were added. Eventually, you mastered all 26 letters of the alphabet, along with some punctuation and formatting keys. That’s at least 40 keys...more for the kids who mastered the number row and got an A in typing.

This same concept is what I am asking you to try.

·        Start with the board set you think your child might be able to manage in a few years.

·        Select a few important buttons—the same ones you would have made up into a smaller set with large buttons.

·        Hide all the buttons around these select few.

·        Give your child time to learn to target these smallish buttons in the middle of large null spaces; it may take awhile, but trust that it will happen.

·        Then, when it is time to reveal a few more buttons, your child will be able to move forward with great confidence.

Want more information on hiding keys to support motor learning? Check out this comprehensive training material from Prentke Romich Company or sign up for one of their Language Acquisition through Motor Planning trainings. Although these are geared towards Unity's semantic compaction, the principles can be applied to most other language access software programs as well.

Playtime Communication Book...and GIVEAWAY!

After posting last week about how we can help our kids build communication skills during play, I thought you might want to see a sample vocabulary notebook. Today I’ll show you some example pages and talk you through building play vocabulary at home.

My sample activity is a “baby book” I made years ago as a gift for my daughter and the new baby Annabelle doll Santa brought her. In keeping with the play theme, I used special paper printed with nursery items and made an “intro” page for pictures and the baby’s “birth” information. We want this to be fun and tickle the imagination! What kind of fun, theme-oriented storage could you use for your child’s favorite play activity?

I began by brainstorming all the activities my daughter might want to do with her doll. Hmmmm, what do other little girls do with their dolls? They feed them, rock them to sleep, change their outfits, give them pretend baths, play imaginary games with their babies…the list goes on and on!
Then, with one major activity in mind at a time, I began to think about the sort of things a little girl might need to help her baby (a diaper, a dress, a bottle, a blanket) and the actions she would carry out on her own (snuggle, feed, lather, etc.). Those would become the words my daughter would use to direct me to help her act out with her doll. Of course, we need to know how baby is feeling, so there are lots of feeling choices, and comments and questions a junior mama would say to her doll, such as commenting about baby’s dirty diaper being “stinky” or telling her baby “sh-h-h,” time to “settle down.” Baby, why are you “crying?” Do you want to “read [a] story?”

Next came time to make symbols. When I made this sample, I wasn’t yet using colored borders; sorry about that! My daughter typically needs loose symbols, so I cut out individual symbols after they were cold-laminated (no fear of edges peeling with cold laminate). Hook-side Velcro went on the backs.  


To keep the symbols organized, I printed labeled grids on sheets of the pretty nursery paper, slid them into plastic page protectors, and stuck loop-side Velcro on the squares. This makes it easy to put the symbols back where they belong and see right away if any are missing (check your socks, your sweater, the dolly’s outfit…it’s probably stuck to one of those).

So, what if your little one doesn’t play with dolls? In a nutshell, you would simply go through these same steps to create a vocabulary notebook for your child’s favorite playtime activity:
1) Think about how typically-developing children carry out the play activity. What situations do they create? What things do they say? What motions do they make?
2) For each main category, brainstorm a list of words that includes:
·        Things needed in the activity (car, road, stop sign…)
·        Actions that happen during the play (race, drive, crash, stop…)
·        Feelings the players have (mad my car got hit, excited I won the race…)
·        Comments (and sound effects!) that fit the scenarios (I won! Good race, Lightning!, Oh no, Vrooom!!!)
·        Questions related to the play (Race again? Ready? Need gas?)
3) Make your symbols and a creative, playful way to store them that inspires the imagination. A simple frame of activity-related clipart can dress up plain storage pages and a clever cover will help your child identify the communication book when it’s time to play.
Keep in mind that your child will not be able to use all this new vocabulary at once! It takes repeated exposure during play, especially if the vocabulary words are not used across his day. But you can use them expressively to model the conversation skills you hope your child will one day master. Trust your child; he is taking in more than meets the eye!
Now, for the GIVEAWAY! If you know a little girl (or little ones in a classroom) who would love a way to be able to communicate with and about her doll, head over to the Doll Play Communication Book Giveaway page for your chance to win the sample notebook from this post. This might just be the ideal giveaway for you!

* * * * * * * * * * *

Other posts related to this topic:
Building Communication Through Play
Getting Ready for Non-Verbal Communication
Eye Gaze Techniques

Building Communication Through Play

Who doesn’t love to play? It’s nature’s way of making learning fun! Kids with severe speech and motor issues need to play just as much as the next kid. In fact, since they may not be able to access play activities by themselves, it’s that much more important for us to provide opportunities for play.

Photo courtesy of drewnew at Flickr Creative Commons

Smart therapists have known the value of play for a long time. My daughter had the world’s absolute BEST physical therapist from the time she was three until just last year. Mr. Tom is magic. He could turn hamstring stretches into a delightful rowing trip across a mountain lake. The tilt board might be a bucking bronco or a spaceship dodging meteors. His fantastic games transformed work into play and physical therapy became a highlight in my little girl’s week.
We can follow Mr. Tom’s lead by creating play in our children’s days. An imaginary story line can turn dull routines into an adventure; it can distract a child’s mind from discomfort. It doesn’t hurt mom or dad to take a walk on this lighter side either. Take it from a mom who tends to be a wee bit too serious at times…
Play is the work of children. In play, they work out social patterns. They exercise their minds and their muscles. They discover scientific principles. They develop language.
It is language development we want to look at today. Those story lines Mr. Tom used exposed my daughter to rich language. Regardless of a child’s expressive ability, she needs to be filled up with wonderful words. I hang tight to the hope that one day my child will have a means of self-expression (just look at how rapidly technology is advancing to accept unconventional forms of input). When that day comes, she will already have in her possession a powerful vocabulary. We need to fill, fill, fill…through talk, through reading, through play.
We also need to give our kids an abundance of opportunities to express themselves. Play is a chance for them to try out vocabulary and language structure. There just isn’t a lot of opportunity for rich expression during some of the mundane tasks that fill our kids’ days. Taking medicine, changing a diaper, and brushing teeth just don’t pull in many colorful words. But play…wow! Think of all the rich words that come as cars and trucks race along a carpet roadway. The play kitchen is ripe with actions and descriptions of smells and temperatures. There are play sets for Little People on the farm, in a doll house, on a bus, in a school that lend themselves to tremendous vocabulary.

Photo courtesy of John-Morgan at Flickr Creative Commons
Children who lack the physical skills to act out the play themselves may learn to direct the play. They can tell you what to do, how to move the characters, what dolly needs. When my daughter was preschool age, she and I spent countless hours on the floor acting out play with Little People (we owned way too many sets, but they were purchases I could justify as being “therapeutic,” right?). She loved caring for her favorite dolls by telling me what to bring her for them or what songs to sing them at naptime. These were activities she would have done for herself if she had been physically able; instead, she developed a large vocabulary to let me know how I could help her act out the play. Because it kept her in charge and involved, she didn’t seem to mind me acting as her hands.
The only down side to this was the time it took me. Playtime was a commitment, as was the prep time for creating the vocabulary symbol cards. But I look at it as an investment in my child’s development. Is there any more important use of my time than spending it with my children? Besides, it gave me an excuse to act like a kid.
Those of you whose children might be interested in directing play with dolls will want to keep checking back. Over the next few days, I am posting a giveaway for a symbol notebook for doll play. Stay tuned…
Happy Thanksgiving to all of you living in the United States!
Rose-Marie
* * * * * * * *

You might also like:
Playtime Communication Book...and GIVEAWAY!


Velcro--the $64,000 tip

Do you remember the TV show, The $64,000 Question? I wasn't around just quite yet, but following it's popularity, any imponderable was dubbed a $64K question. There's a $64K question related to Velcro--How do you cut a skillion little pieces for your communication cards without making hamburger of your fingers and gumming up your scissors?

Oooo, ouch!
The question fits well in the topic of communication as we think about the materials we use to make symbol communication materials. Families and classrooms that use communication symbols also use Velcro by the mile. We use it to adhere them to symbol boards, to store them on indoor/outdoor carpet, to stick them into books and to the ceiling of the van…and the list goes on. If you are lucky enough to be able to afford half-inch dots by the roll, you are indeed fortunate.
Gold!
The rest of us who have to economize by purchasing bulk Velcro-by-yard can tell you how much pain can be involved as we poke our fingertips with the sharp plastic covering the adhesive. Never mind how many hours we have frittered away trying to peel all those pieces and remove adhesive from our favorite pair of scissors.
Well, no more! Tender fingers unite! Enter the $64K answer to that pesky question about mastering Velcro. I want to share with you a system for handling Velcro that has saved me countless hours and kept my fingers pain free. It was taught to me by a wonderful speech therapist named Carol. She doesn’t remember who showed her, but I swear that person should be sainted. They have no idea how much time and finger pain they have saved me.
Here is the trick: Put away your scissors and trade it for a rotary cutter, the kind of “pizza wheel” device used by quilters and crafters to cut fabric. For this job, I prefer a smaller rotary cutter (18 or 25mm) and a small mat (6” long). Now rotary cutters are razor sharp, so you have to use a special cutting surface to protect your tables and counters. Also, keep them far, far away from little fingers and always retract the blade when you set them down.


There are self-healing mats intended for such a use, but you can use a plastic cutting board nearly as well. I find the Velcro peels off easier from the cutting board, but you will wear grooves in yours over time. Notice the faded markings on mine...lines with 3/8" hatch marks.


Lay your ¾” Velcro against the mat and cut a length.

Then peel the backing off (just this one time, I promise!) and stick it to the mat. It will peel off just fine later. Cut down the middle of the length of the piece, giving you two strips 3/8” wide.

Come back and slice in little stripes 3/8” apart, giving you a whole line of 3/8” squares. How easy is that? A 3/8” square is just the right size to hold firmly to the hook side yet release without requiring strength…an issue for some kids with muscle weakness.


The lamination on your symbol cards will influence how well Velcro will stick. Hot laminate films stick fine (just know that the edges will peel in time unless you allow a 1/8” border of film around each symbol), as will clear Contact paper or clear packing tape. I have never used lamination pockets, so I can’t tell you how well Velcro adheres to their plastic. Velcro does not stick to cold laminate films that are made with silicone, such as Xyron’s films for the wonderful old Brother CoolLaminator. If you have a treasured CoolLaminator as I do, do not fear! Duct tape does stick to the silicone-coated film, so haul out your trusty rotary cutter and mat and slice it into 1” squares. Stick one to the center of a symbol and adhere the Velcro to that and you’re good to go!


At risk of sounding like a broken record (does this generation even know the origin of that phrase?), I will repeat the Velcro mantra:  soft on the environment and hard on the card. Use the hook side on the cards; the worst that can happen if you rub against it is a small scratch. A 3/8” square stuck to your living room carpet won’t pull the carpet loops out of the backing. Use the soft loop side on everything else, so that when you brush against it you won’t feel any pain or snag your sweater. Trust me. Just do it.
One more thought...if you are a parent looking for a thoughtful holiday or teacher appreciation gift for an especially supportive, creative teacher or speech therapist that lives in a sea of little Velcro pieces, a mini rotary cutter and mat set makes a lovely gift. I promise, it will get used!

Adapting Picture Books for Lap Reading


I’m just a big kid at heart because I love picture books as much as any child! There are so many great picture books available, with great story lines, engaging language and delightful pictures. They can be quick to read but invite you to pour over them again and again. They teach children so much about language and life without it even seeming like work. Picture books invite loving interactions between adults and children…  What more could you ask from something about ¼” thick that doesn’t have to fed, watered or pottied?

For kids with disabilities, the benefits of picture book reading are magnified. They bring vicarious experiences to kids physically unable to explore the world on their own. They allow children who cannot otherwise experiment with speech to play with language and rhythm and sound. Their colorful illustrations engage wandering attentions and provide visual anchors to abstract concepts. And picture books offer time for nurturing physical contact that isn’t related to medical care—a scarce pleasure for some of our kids with extreme health impairments.

It’s that last point about lap reading that I want to focus on today as we talk about picture books. Another Wednesday I’ll talk about making books independently accessible, but for today, let’s look at how we can make lap reading the fullest experience possible for our kids.

What “ingredients” make for a meaningful lap reading experience? There are the players…a relaxed adult or older sibling, who is willing to give the time needed for an unrushed reading. The reader should be comfortably enthusiastic and animated, keeping the experience interesting and sharing a sense of delight in stories and books. The child should be ready; those who are hungry or cranky will be more distracted than they will be able to immerse themselves in a great book. Then—and this is such an important point—they need to be positioned so they can see! Some kids have physical challenges that prevent them from sitting up and you may need to ask your physical therapist about the best way to set up for suitable “non-lap” lap reading that still promotes physical bonding.

You also need a book…selecting the perfect read is a topic that could fill many posts! But for now, let’s keep it simple. A great book is one your child will love and that you don’t mind reading repeatedly. Remember, typically developing children beg us to reread the same book until we would prefer to hide the thing both have memorized it by heart, and there is important learning and literacy development that is supported by this repetition. We must give our kids with disabilities the same opportunity to request their favorite titles over and over…and over…  At the same time, kids need access to lots of books, and thankfully libraries are full of them! Great books have stories that we will remember because of their funny words or awe-inspiring pictures or the way they make us laugh or help us understand our world better.

A book read with an adult doesn’t (usually) have to be adapted to withstand the kind of abuse it might receive if a child was reading it independently. Some kids may still need super-strong or drool-protected books, but often adults get pretty good at pulling delicate books out of harm’s way at just in the nick of time. Children with vision impairments will need some adaptations to give the book tactile information. [I promise, I wrote myself a note so I won’t forget to post on these adaptations another time!]

However, if a child is non-verbal, a book will ideally be adapted so he can talk about it with the reader. While a child able to point may respond to questions by touching parts of the pictures that relate to your questions (“Ooooooh, who is sneaking up behind Max?”), it isn’t easy for him to chime in with the story unless it has some kind of symbol support. Also, not every illustration has all the elements needed for a child to be able to use it conversationally. Symbol support helps with this problem. If you need ideas about how to create communication symbols, check out this post.

For young children, it’s quite fine to provide symbols for just the main actions and characters or objects. Don’t worry about representing little words like “the” or “if” with symbols.

I like to attach little squares of soft LOOPy adhesive hook-and-loop tape (hereafter known simply as "Velcro" to reduce otherwise awkward reading, but any brand will work) to the book itself, as close to the word as I can without blocking the picture or text. The reason that we use the LOOP side in the environment is that it is soft to the touch (I promise, you don’t want to brush a bare arm against the scratchy Velcro hook side when it’s mounted on the wall!). We attach the HOOK side to the cards. If you do this consistently across all environments, you will get a lot more use out of your symbol cards (I saw a classroom once where half the symbols had hook-side and others had loopy-side Velcro. Symbol management was a nightmare, to say the least!).

How do we encourage kids to participate in the book reading and discussion using symbols? If there is a repeating line that comes up regularly, they can tap on the cards each time it comes up in the story. Better yet, record it on a BIGmack or similar voice switch and encourage them to chime in with you when the line repeats.

Hook-side Velcro sticks beautifully to inexpensive indoor-outdoor carpet from the local hardware store. Use a square to hold symbol cards as you read. Peel them out of the book as you go along and stick them on the carpet square to retell the story after the book is finished. Scramble up cards from the story and have your child help retell it in the correct order.  


Ask your little reader her opinion about characters and events in the story and let her use the symbols to share her preferences. But do remember, lap reading isn’t about testing…it’s about conversation!!! Keep your questions non-threatening; now isn’t the time for right answers but for ideas and opinions, just as you would expect to talk about books with an adult friend. As children get used to sharing their feedback with you, you will also want to build a set of symbol cards or a board of symbols that allows them to request and comment. You might want to store extra vocabulary that is specific to a certain story right inside the front or back cover (i.e.: “frustrating” isn’t a concept found in enough children’s stories to merit full-time space on most symbol boards, but it might be pertinent enough to a particular story to Velcro a “How frustrating!” card inside the cover for commenting).

While I personally believe every child deserves daily lap reading, as a teacher I realize this doesn’t happen in every home. In schools, we can provide an intimate small group reading experience that comes in a distant second. I’m happy to share ideas to simplify the process if anyone is interested…just let me know!

Enjoy lap reading with your kids this week! The memories you build with your child during these times will bring you both pleasure for years to come.

* * * * * * * * * *

You might also like:
Adapting Books for Physical Access

Materials for non-verbal communication, Part Two

Yesterday we left off figuring which type of symbol your child can use best to express herself. This can take some time and experimentation, and that's just fine. My own daughter went straight into simple line drawings and that worked well for her.

Today we'll look at backgrounds and sizes of symbol cards.

Card size is determined by several things. The most important consideration is your child's visual and developmental needs. Very young children and those who have difficulty seeing tend to do better with larger symbols, such as 3" or 4" squares. This size is also sometimes needed if children require a large target to swat. 2" is a fairly standard size used by many kids and classrooms because it's still easy to see, and has the advantage of being large enough to be handled individually or pointed to on a board of several symbols. Symbols smaller than 2" can be a bit tricky to use (mostly for the person communicating with the child!) and are usually reserved for children with AMAZING pointing abilities or for access on computer screens.

Situations also dictate symbol size. If you are adapting a book to read along with symbol support (I'll cover this in a future post), the size of the book may require smaller symbols just so they will fit. If you need your child to make LARGE head or arm movements so you can see them easily (i.e.: watching in a mirror while riding in the car...be sure you are a PASSENGER interpreting your child, not the driver!), you might need to make oversized symbol cards for that situation. And here, I must digress to share a heart-warming story about large symbols...

My daughter had the most FABULOUS kindergarten teacher ever! This wonderful woman was a general education teacher embracing A, with all her unique challenges, into her typical classroom. Mrs. C had never had a student like my daughter before but she adjusted with grace and style. We created large yes/no cards--5 or 6" across and laminated onto cardboard--so A could respond to questions during circle time when all the students sat on the floor gathered around the teacher. In a fit of sheer brilliance (maybe it was frustration, but I consider it brilliance), Mrs. C asked ALL the students to answer her questions "talking with your eyes, the way A does." The cards were large enough that the whole class could respond with only their eyes...and thus the "silent response" was born. Mrs. C discovered that this response style calmed her enthusiastic little crew on those wiggly-noisy days when a productive circle time would have otherwise been impossible. Best of all, it gave the kids practice with A's communication and made them more watchful partners. I don't know if it helped A feel more blended into the group or an honored member but, either way, she loved it. Mrs. C had always taught her students sign for the letters of the alphabet, which I admired because it built an appreciation for an alternate way to speak (and it kept busy little kindergarten hands doing something constructive). Now the students had several non-verbal strategies to communicate...valued, natural, normal methods. How blessed are they to bring such an outlook to life!

Symbols don't have to be printed on colored backgrounds, but there are some benefits to color-coding. When children move from selecting between a few symbols to a whole board, color codes help them find the symbol they want more quickly. Color codes are especially helpful when children start combining symbols into phrases. But probably the biggest help is that they remind the adults talking with their non-verbal kids to pay attention to the kinds of choices we are offering. Are we teaching and talking only about things? Are we giving our kids chances to request activities? To comment or ask questions? Are we modeling and offering language rich with descriptors? When our symbols are color-coded, a quick visual scan at the options we have set out will answer that very quickly! Remember, just as the nutritionists tell us to "eat a rainbow," make sure you also "speak a rainbow!" The corollary is to make sure our children also have the opportunity to speak rainbows. If ever we find ourselves offering choices from only one color category, we need to change what we are doing.
 
The most important thing with color coding is to be consistent with the colors you chose. Fitzgerald (1954) created a key that is the most widely used today in high-tech devices, so it is a good one to start practicing with early on. In fact, if you suspect your child will someday move onto a computered voice output device, you might check out what colors are used on these devices and incorporate them from the beginning (i.e.: VS Communicator used on the Tobii devices assigns purple to items in the "places" category, light gray to "time" items).  

Goossens', Crain, and Elder (1992) created another key for color-coding that was the standard for use in special ed preschools for years, although I don't know if that is still the case today.


Color coding can mean printing on colored paper (which means you need to be very organized and plan ahead), printing solid colored backgrounds (if you own stock in a company that makes printer ink refills), colored in with highlighter pens (if you have unlimited time) or printed with colored borders (for those of use who have to limited money AND time). Three guesses as to how we color code at our house...I have neither time nor money!

One quick side note:  I do print YES on a solid green background and NO on solid red. It makes for some quick looking!

As we talk about sizing and adding colors, making the symbol cards starts to get more time consuming if you are using a word processor. If there is a way you can afford--or find funding for--a commercial symbol creating program, you will thank yourself.


Materials for non-verbal communication, Part One

You and your non-verbal child are probably already using some tools to communicate. Even tiny babies start early with objects, so let's begin there.

"Objects" would be just what you expect...the very toy, book, DVD jacket, snack food, shirt or whatever other item you might be talking with your child about. If you hold up Goodnight Moon or Bartholomew Bear as you offer to read your baby's choice and she points to Ba Bear, she has just used the book as an object to express her choice. It's an intuitive thing for both parent and child to do, and can be a very convenient way of incorporating choice-making in a natural way.

Even though my daughter is a teenager and capable of reading, we still grab objects when they are the most convenient, natural option. If she's choosing a movie, why not simply hold up the DVD jackets? It's quick and involves no extra work of creating a symbol to represent each movie. The same process goes for choosing outfits to wear or music albums. Sometimes it's appropriate to be able to select from a whole library of options, but when we need a quick choice, the simplest method is to snatch up the actual objects.

Some speech therapists subscribe to a theory that we must begin with the most concrete of symbols--objects--and progress through a specific sequence towards less concrete ones. My child development background causes me to cringe at that idea; I say we figure out what works for a child where they are now and start meaningful communication at that place. Personally, I believe that by the time we realize a child is not going to use speech, they have already had a great deal of practice with objects as a means to express their choices. Most will be ready to move to some form of symbolic expression about the time their peer group is learning to talk unless they have a visual disability and can only decipher meaning by touching a 3-dimensional object. If your child pays attention to illustrations in the picture books you read together, particularly if he looks to an item you mention specifically, you know he is capable of moving to a symbol system.

Paper symbols are easy to use and store (okay, storing the symbol cards can be a bit of a challenge, but folks have come up with some clever systems over the years). Symbols come in several varieties, each with their own benefits and drawbacks. While I'll present the paper symbols from most to least concrete, please don't think your child has to "progress" through every type! One will probably have greatest meaning for your child, and that's where you jump in.


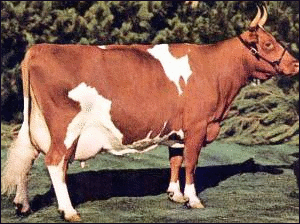
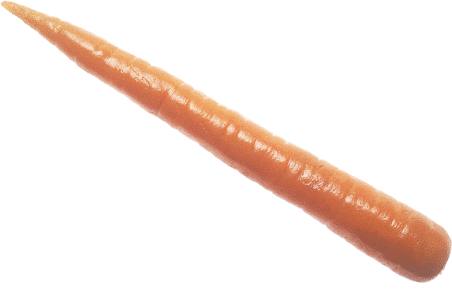
1) Photographs, such as these from http://www.wpclipart.com/:


Ayrshire                 carrot 3

Real pictures of real items and actions can have very clear meaning. It is important to highlight in a photo ONLY the idea you are trying to have your child express. If you take a photograph to represent the child's pet, for example, ONLY the cat should appear in the photo...no living room, no kitty toys or food dishes. The cat's head or body would be photographed against a plain background, clearly identifiable as the cat. If you want to show "running," narrow in the focus to a single child running across an open field or blacktop rather than capturing the whole playground in the field of view. This visual clutter distracts from the meaning of the photograph. Become close friends with the crop tool if you take your own photographs. You might want to explore some of the commercially produced photo symbols.


 Clear photograph of "egg" with no distractions. It could be improved with a higher contrast background.


  Confusing picture showing "eggs." The child might focus instead on the bag, the arms, the shirt, the idea of "carrying..." Even if you were to draw a circle around one of the eggs to highlight it, there is still too much visual information.

Advantages of clearly photographed objects as symbols:  smallest cognitive jump from objects, easily personalized for the people/places/objects in the child's world, any item or activity that can be captured on film can become part of the child's vocabulary.

Disadvantages of photographs:  complexity of photos can be distracting (ie: child studies people's faces rather than making choices), cost of colored ink, learning curve for taking/editing excellent photos, challenge of illustrating abstract ideas (ie: how do you photograph "on" without the child being distracted by the objects in the photograph used to demonstrate the concept?).

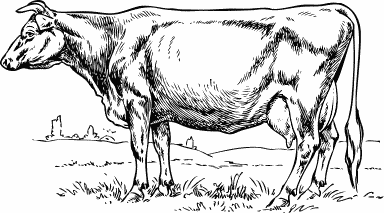
2) Realistic drawings, like this: 
cow sketched
(http://www.wpclipart.com/)

carrot at rest
(http://www.wpclipart.com/)
         
These share some of the same advantages and disadvantages of photographs. Drawings tend to be fairly obvious. Sometimes the detail can be distracting, especially if there are a large number of choices presented at once.

3) Line drawings, such as these PCS symbol from Mayer-Johnson:

These can be printed in color or, for higher contrast, in black and white. Simple line drawings have the advantages of being quick to recognize from a large number of choices, drawn quickly if you are artistic, and purchased commercially. A disadvantage for some children is that they are more abstract than either photos or realistic drawings.

4) Words. Once kids can read, they may be able to use written words as a "symbol" choice. After all, words are symbols that literate people use every day to gain and send meaning. Words can be printed on cards or written on dry erase boards, provided the letters are large enough to support the child's visual needs. Advantages to words as symbols are that the set of choices is limitless and meaning is clear. Disadvantages are that children must be able to read and that the possible choices are not always visually distinct, which slows scanning across the available choices.

(courtesy of Mayer-Johnson)
Let me state a bias here that all paper symbols should be labeled. This not only helps develop awareness of the written word, it clarifies for everyone just what the symbol means! As hard as we try to make clear the meaning of a photo or line drawing, sometimes they are still a bit ambiguous. A label addresses this problem.

Paper symbols can be made with several commercial software programs. These programs tend to make the process of creating symbol cards quite efficient. As your child's vocabulary grows, you may find this to be a wise investment. Symbol cards can also be made in a word processor by inserting pictures or drawings into a table. While this is a time intensive process, it is an inexpensive way to get started...and it's something you can do today.
Tomorrow we'll look at symbol size and color. In the meantime, today would be a good one to try a variety of symbol styles to see which style works best for your child.

* * * * * * * * * * *

You might also be interested in:

Resources for Free Communication Software

Materials for Nonverbal Communication, Part Two

Eye Gaze Techniques

Here are some additional pointers about communicating with eye gaze using objects, symbols or words. I left the post as I wrote it for the Rett Girls AT Ning because it didn't really seem to call for any changes. There are some concepts repeated from Friday's post but these are very important to internalize. If there are any things you would like me to elaborate on in the future, would you please drop me a note or leave a comment? Thanks!

I posted these suggestions on using eye gaze to another list, but thought maybe it would be helpful to repeat here. My daughter uses eye gaze to communicate, what I have learned is from her and other eye gazers I've worked with informally. Other folks' experiences may vary from ours, but here is what our experience has taught me:

1) Just because the concept of eye gaze is simple, reading eye gaze is not necessarily easy. We need practice and experience to become competent partners. Not all kids use the same techniques, in part because the end goal for each child may not look the same (see #2).

2) Eye gaze response procedures should keep in mind technologies to be used in the child's future. If a child will be using a dwell-click with head mouse software, for example, then it is important that they learn to hold their gaze to a choice for a specific length of time. Children who will not be advancing to a head mouse may find it beneficial to confirm their choices with eye contact to the communication partner, especially if they are socially motivated.

3) Similarly, if head mouse use is in the child's future, helping them learn to turn their head along with their eyes will support that technology. This can roughly be considered "nose pointing," although the child is merely directing the nose toward the choice, rather than touching it with the nose. If head mousing is not in the child's future, it's fine to hold the head still and cast long sideways glances with the eyes.

4) Motor ability must be considered. The length of dwell to a choice should be reasonable...five seconds (a standard dwell time expectation in too many IEP goals, sad to say) is WAY (WAY!!!) too long for most children, both in terms of head stability and attention span. Try it...five seconds is an ETERNITY and it slows conversation down to a pathetic pace. At our house, .90 seconds is a good dwell time and doesn't interfere with the flow of communication.

5) Positioning yourself as a receiver is very important. You must be able to see the child's eyes clearly. However, some children fixate on the face of the reader, so you need to be flexible. Head-on (180*) will work for students who do not fixate on faces, but for children who are hyper-fixated on faces, an angle just over 90* may be more appropriate. You learn from the child what they need as far as positioning in relation to the partner.

6) Children with hyper-fixation to faces may benefit from loose symbols held side-by-side in front of the reader's face, then slowly moved apart. The child's eyes will (hopefully!) follow the intended choice as they move.

7) Boards intended for finger-pointing tend to have symbols spaced too closely for all but the most skillful eye gaze readers (and users). Loose symbols allow you to distance the choices at optimal points from the user. These can be held in the hands or affixed to velcro-sensitive boards (I personally like 3"-wide strips of indoor/outdoor carpet mounted to mat board, 15-18" long. Post-It makes poster board that can be cut into strips that holds symbols temporarily as well).

8) Not all days are necessarily the same. Some "off" days may require few choices spaced at farther distances, while other "on" days may allow a child to handle many choices placed closer together.

9) Along these lines of "off" and "on" days, if the child suffers neurological swings, it is imperitive to tailor our expectations to the child's ability at the time. This may sound basic, but it is a point often overlooked in our hurry to take data.

10) Some children do very well with fixed frames. These are nice because they free the partner's hands and can often hold many choices. There are directions for some wonderful PVC frames online (
http://www.cdl.unc.edu/link/Tech-It-Easy/Tech%20It%20Easy/Tech%20mo..., http://www.everhart.leon.k12.fl.us/downloads/pvcbook.pdf and others). There are also commercial e-Tran frames of Plexiglass (Cogain and others). Again, you must keep in mind the child's preferences and tendencies to fixate...

11) The goal of eye gaze communication is COMMUNICATION! It is NOT testing! Kids pick up on the fact that they are being heard or being tested, so make sure you honor what they tell you!!! This is probably the single most important point in all the discussion of eye gaze. For some reason, we tend to doubt eye gaze responses. This is because of our OWN insecurity in reading the answer correctly. If we honor a child's response, they learn to trust us as communication partners. If they indicated what they intended, we validate their answer. If they answered in error, we STILL validate their answer and demonstrate that we honor what they say. The children learn they must change their strategy to communicate the accurate answer and that they must find ways to negotiate to get what they had meant to tell us.

12) When you are unclear of a child's answer, DON'T repeat the same question. Ask it a different way. Try asking it in a way that would require they show a different answer ("Do you need more time?" becomes "Are you all done then?"). Show respect by letting the child know that you are the one having difficulty understanding; it is not the child's fault.

13) Try to keep the same placement of symbols offered for choices. This allows the child to develop motor automaticity. You may start to see eyes heading to a location before a symbol is even offered; this definitely suggests the child has achieved motor automaticity.

14) Not all children need to demonstrate "scanning of all the options" before making a selection. Motor automaticity may come to play, as well as peripheral vision skills. This does not mean kids aren't expected to know what all the choices are, but it does mean that "scanning" them may not look quite like we expect. An example is this: A teacher offered my child yes/something different/no in the same order each time (hurray! Way to build motor automaticity!) but would not accept the answer until she had gazed at each choice first. This is both unnecessary, slows communication, and discounts motor automaticity.

15) As soon as possible, eye gazers need to have introduced an option to indicate that what they want to say is not among the choices. This can be most anything ("something else," "not here," "different idea," whatever works for you and the child), but it is not fair to force a child into choosing only between choices they don't really want. Otherwise, the only option we give them is to NOT choose...and then we've set them up to be labeled as "non-communicative."

There are usual communication strategies that we can't forget: motivating topics, making the child responsible for sharing information that they alone would know (highly motivating!), respecting the answer, GENUINE conversation...

I hope this helps. Again, it's just what I've learned from walking in the trenches.

Rose-Marie


* * * * * * * * *

You can find more like this here:

"She talks with her eyes"

"Yes," "no," maybe so...