Showing posts with label picture books. Show all posts

Adapting Books for Computer Access

To become readers, children need to read. According to Dr. Karen Erickson, one of the nation’s leading experts on literacy for people with disabilities, children need access to 1500 books to develop literacy. In order to qualify, these books must be accessible to the child.  

But kids with severe motor or reading challenges may not be able to access traditional books. We have talked about adapting books to make them more physically accessible. But even these adaptations don’t allow independent reading for every child. What if a child cannot hold a book at all or turn its pages? What if he has not figured out how to decode writing and needs to have the book read aloud so he can stay engaged?

For kids with these issues, the computer opens up wonderful possibilities for access to books. It can remove some of the physical and cognitive barriers that make traditional books inaccessible. They can hit a switch to turn the page, or even have the pages turn automatically. You – or the computer, if yours is equipped with a pleasant voice – can read the text out loud.

Through the computer, kids can have access to the same books used by their classmates, just in a different format. They can have opportunity for pleasure reading.

And there’s more good news – it is easy to adapt books to read on the computer! Once you get into a rhythm, it even goes pretty quickly.

There are plenty of commercial software programs commonly used with students in special ed classrooms that can display books on the computer:  Classroom Suite, Clicker, BoardMaker, My Own Bookshelf…the list goes on.

The good news for families – or for school districts affected by the current economy – is that books can also be easily created in PowerPoint, a program commonly found on the average computer. I’ve never used OpenOffice’s Impress myself, because my computers have always had PowerPoint, but my understanding is that it can be used similarly – for free!


Before we get into the nuts and bolts of creating an adapted book, let’s take a minute to talk about copyrights and Fair Use. Copyright law prohibits the willy-nilly copying and dispersing of materials to protect the interests (and livelihood) of those who created them. The Fair Use Act says that materials can be adapted for access by people with disabilities, provided we follow certain guidelines. We must own the book, for example. The adapted form is for use only by the person having disabilities (i.e.: we do not sell or otherwise circulate the adapted material).

Here’s a great way for teachers to demonstrate Fair Use as they adapt books. Save the adapted copy to a disk which is then stored inside the front cover of the book. This demonstrates ownership of the book – it’s right there in your hand, after all, and not on some library shelf! It also makes organizing a breeze, because you know where the disk should lives.

Okay, with that under our belts, let’s get started! I’ll walk you through an adaptation of Joyce Dunbar’s book Baby Bird (Scholastic, 1997).

1) Create a new folder on your computer desktop and name it for the book. Important: you will drop EVERYTHING related to this book in this folder. It will save you time not to have to fiddle with a finding the file each time you need to open it. Trust me.

2) Take a “picture” of the front cover and all the pages of the book. You might like to scan them on a flatbed scanner, which allows you to fold lots of laundry at the same time. It also tends to result in less “doctoring” later. Save the scans to your Folder.

You might prefer to snap a picture of the pages with a digital camera, which is a very fast way to accomplish the capture. It also works well for oversized books that don’t fit on a scanner. Just be sure your camera is steadied at the same exact distance for every shot. And use high resolution. Import them to your Folder.


This is how I set up for a “book shoot.”  
A Velco strap on the tripod anchors the camera to a chair.
The tape on the floor keeps everything lined up j-u-s-t right.

3) Correct the pictures in a photo program (I use Paint.net – it’s free and easy to use).
            -- Crop out anything around the edges of the page.
            -- Adjust for brightness if needed (the pages may need some corrections along the spine, too).
            -- Adjust any tilting (sorry, Paint.net doesn’t do this…better to shoot straight)
            -- Name the pages (00, 01, 02, etc.) and save to the Folder.

4) Set up your PowerPoint template. For a VERY complete discussion on this, check out Create Talking Books: PowerPoint from the Assistive Technology Training Online Project. It gives you links to Richard Walter’s ever-so-complete guide to building a template from scratch, How to Create Talking Books in PowerPoint ’97 and 2000. As well, you will find an 8-page quick start guide. And a template. 

If you want to build your own template, whether in PowerPoint or one of the assistive software programs, it’s basically a blank page with next page/previous page buttons. You may wish to have pages “turn” automatically or to enter a delay feature to prevent rapid-fire switch hitting.

            -- Open PowerPoint and set the slide for a blank layout. I’ll use PowerPoint 2007 in the  screenshots. I like to activate the gridlines (“View” tab) so I can line things up nicely.


            -- Add page navigation buttons. Place a Previous Page action button to the lower left corner and a Next Page button to the lower right (Insert > Shapes > Action Buttons). Size them equally, making them large for fledgling mouse users or small for switch hitters, using the gridlines as a guide.


            --If you want a clickable button to speak the text, add an optional Play Sound button. We’ll come back later to adding speech, but for now, if you want human narration, slip that button into the template.
            --If you need to set a delay to prevent repetitive hits (or just slow the kids down so they are more likely to engage with the text), cover the whole page with a Magic Invisible Box (Insert > Shape > rectangle). Temporarily, it will block out the page; that’s okay. You want the rectangle to block access to the buttons and then “disappear” so the buttons become available to act. Select Animations (1) > Custom Animation (2) > Add Effect (3) > Exit (4) > Disappear (5). Decide how much time you need the navigation buttons to remain unavailable and enter this in the timings.


Now doubleclick “disappear” setting to call up the Disappear Effects box (1). In the Timing tab (2), select “after previous” (3) and set the number of seconds to delay (4). This can vary according to your student’s needs. NOW format the rectangle shape to “100% transparency” and “no line” to make it invisible. "No Fill" will not substitute here; you need 100% transparency to make the magic happen!


            -- To make the pages forward automatically instead, set the slide transition (Animations (1) > Advance Slide (2)) to advance automatically after a set number of seconds. You can adjust this up or down to accommodate different lengths of text once you start filling in the template.


            --Save the template to your Folder.

5) Import pictures to the template. Be sure to line them up with the gridlines so every picture has the same dimensions. This makes for a much smoother read!


6) Adapt text if needed. Your student may need the text to be rewritten in a larger or simpler font or reduced in amount. Also, if you plan to use text-to-speech with this book, there must be “written” text for it to recognize rather than a photograph of text. I like to cover the existing text with a rectangle, set the rectangle shape to “no line,” and then color-match it as close as possible using the Custom Colors dialog box. If you move it so the bottom-right corner is close to your text box, you can eyeball a pretty decent match.

An interesting utility for perfectionists might be OB Utilities’ Color Picker (whose trial offer freaked out my Norton antivirus, so I couldn’t test it to give an opinion).


This is the same page as the last picture, only with a text box
added on top of the original writing.
Isn't that so much easier to read

7) Add narration if desired. There are several ways to go about this.

To narrate individual slides with a human voice, you can Insert (1) > Sound (2) > Record Sound (3). Click the red dot on the Record Sound pop-up and save it the Folder. It creates its own little sound icon, which you can enlarge to cover the sound button at the bottom of the page.


If you record outside of PowerPoint using something like Audacity (free, wahoo!, gives you lots of control). PowerPoint uses .wav files, so it’s easy to export these from Audacity to your Folder. Hyperlink this sound (faithfully saved to your Folder, right?) to the button at the bottom of the page.

You could also have the narration play automatically with a delay if you attach it to the exit action of the Magic Invisible Box (see Item #4, setting up your template). Look under the “effects” tab for sound settings; here is where you attach the sound file from your Folder.

Another option is simply to narrate the whole book, rather than individual pages. To do this, click the View tab (1) > Record Narration (2) > OK to the pop-up box (3). Choose where you want to start (the front cover is a good place!) and walk through the book, reading aloud as you go. The narration will record BOTH your voice AND the timing for each slide.


One last option is to have the computer read the narration. For this, you will need a free Add-On called PowerTalk. It will read the text you have typed onto the page. To use, launch PowerTalk first, then the PowerPoint presentation or show you have saved.

8) Save the PowerPoint to the Folder. Burn the Folder and all it’s contents to disk. Keeping everything in one folder insures that the sound files will copy with the PowerPoint. You can certainly save a PowerPoint package, but I like the freedom to access the original creation and make adjustments for future students – or your own child as she progresses – with different skills. I like to also save a PowerPoint Show (.pps) copy that cannot be altered. This avoids, er, accidental changes. If you include the student’s name in the filename, you will know you are opening a copy that is accessible to that student.


 9) …and store inside the front of the book. Here are a couple tricks make this storage system work especially well.
1)      Print labels for each disk from a picture of the book jacket. This makes it easy for students to match the pair before putting them away. I personally use Avery Dennison’s “CD Stomper” and labels.

2)      Fix a paper computer sleeve or an envelope to the inside of the jacket with clear packing tape or clear Contact paper to make it strong.

3)      If the books will be carried by students (let’s say you have a wonderful helper who does cleanup for you), I recommend facing the opening of the enveloped towards the spine. This keeps the disk from sliding out.
The envelope on the right keeps the disk from slipping out
when the front cover is closed.
There! It sounds more complicated than it really is. Once you make a book or two, you’ll be able to crank them out in little time. Also, for teachers, this is a great job to assign to parent or high school volunteers, especially those who can only help out from home.

Let’s get reading!

* * * * * * * *

You might also like:

Adapting Books for Physical Access
Adapting Picture Books for Lap Reading

Adapting Books for Physical Access

Books that are loved by kids sometimes get loved hard. One of my favorite keepsakes from my girls’ infancy are picture books they asked to have read over and over, and that they themselves devoured on their own. I use the word “devoured” quite deliberately; my oldest daughter ate all the corners off her favorite Kittens are Like That. While it makes this memento especially dear to my heart, we can’t have whole libraries consumed by little teeth.
When kids “read” on their own, their books sometimes need protection from exuberant little hands or lips. And sometimes books need to accommodate fine motor issues to be more accessible. We are going to cover these issues today.
Increase durability. The suggestions below work well to ward off accidental bumps and bruises to books caused by difficulties grading movement, myoclonic jerks, yanking books away from others, forgetting how to handle books carefully, and drooling. I don’t know anything that can make a book stand up to deliberate destruction. PLEASE leave a comment if you have an idea for that!
·        Board books. The titles printed on cardboard is ever-increasing, so check to see if the one you want is available. Classic favorites, such as Goodnight Moon and The Hungry Caterpillar, are easy to find. Longer selections from authors such as Marc Brown (Aurthor's New Puppy and D.W. Thinks Big) can be found if you search.

·       Laminate pages. The hardest part of this is sacrificing the binding of the commercial book, tearing it apart to laminate the pages. Does that violate every sense of propriety for you the way it does me? After each page is laminated, lay the first page against the second and use wide clear strapping tape to secure them together. Turn the second page and lay the third against it, taping where the pages meet. Continue until all pages are taped. Place the covers face down, leaving a slight gap between them, and tape. Now lay the taped pages inside the covers and tape at the binding. Use clear contact paper to cover the outside of the book and strengthen the binding.

If you look hard at the end of the arrow, you will see the edge of the strapping tape.
The folded-over edges of the clear Contact paper covering are also visible.

     Some books arrive with staples at the spine, and these are even easier to take apart. Remove the staples and laminate each two-page spread. You can re-staple them to the cover if you have access to a book-maker’s stapler. Or, try stitching down the spine with dental floss and an upholstery needle in long 1/2" - 1" stitches. Go from bottom to top, and then trace back down through the holes you made previously. Tie off and cover over the stitching on each side with clear strapping tape.
These stitches are about 1/2" long and have been covered over
with strapping tape for durability.

  • Use page protectors. Cut apart books (or make your own) and insert them into plastic page protectors. For heavy droolers or fingers that seek to destroy, seal the open end with clear strapping tape.


Facilitate page turning.
  • Page fluffers. These separate the pages to make them easier for fingers to slip between. Some even allow pages to turn with a gross swipe. If you have adapted story books with Velcro to hold symbols, the Velcro may be enough to spread the pages. There are many lightweight objects that can be used to fluff pages apart, but my favorites are the temporary ones taught by Karen Erickson. These can even be used in library books until they must be returned. 

           
            You’ll need:
            Oaktag (or manila file folder), cut in 1 1/2” strips
            Small paper clips, a whole handful
            Self-adhesive foam weather-stripping
            Slide paperclips, small loop on top, across the length of oaktag. Space the clips every inch. Remove the backing from the weather-stripping and stick it across the small loops of the paper clips, aligning the edge of the weather-stripping with the edge of the oaktag strip. Cut apart, centering one paperclip in each fluffer.To use, slide the book page between the long loop of the paperclip and the oaktag, offsetting each fluffer from the one before it.   
A page fluffer attached to the edge of a book page.
(My apologies for the sideways photo...
irritating software glitch!)


Page turner. These are “tabs” that stick out from stiffened pages that may be easier for hands to use. You can use popsicle sticks held with clear packing tape or daily contact lens cases glued to the edges of board book pages.

Next week we’ll talk about computer-adapted books for kids who cannot manipulate physical copies of their stories or need additional auditory input. I hope you are looking forward to it as much as I am!
* * * * * * * * * * *

You might also like:
Adapting Picture Books for Lap Reading

Adapting Picture Books for Lap Reading


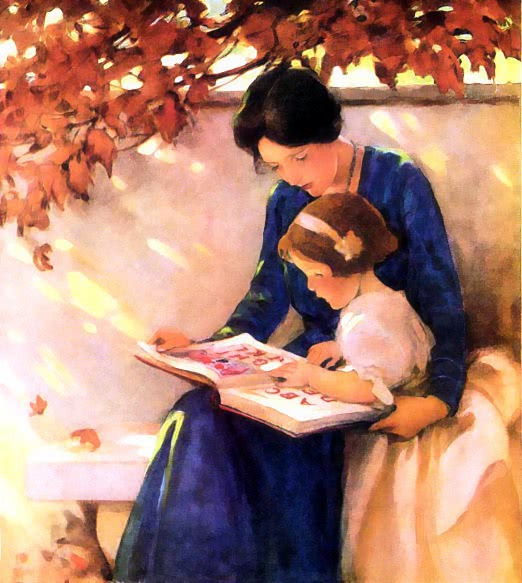
I’m just a big kid at heart because I love picture books as much as any child! There are so many great picture books available, with great story lines, engaging language and delightful pictures. They can be quick to read but invite you to pour over them again and again. They teach children so much about language and life without it even seeming like work. Picture books invite loving interactions between adults and children…  What more could you ask from something about ¼” thick that doesn’t have to fed, watered or pottied?

For kids with disabilities, the benefits of picture book reading are magnified. They bring vicarious experiences to kids physically unable to explore the world on their own. They allow children who cannot otherwise experiment with speech to play with language and rhythm and sound. Their colorful illustrations engage wandering attentions and provide visual anchors to abstract concepts. And picture books offer time for nurturing physical contact that isn’t related to medical care—a scarce pleasure for some of our kids with extreme health impairments.

It’s that last point about lap reading that I want to focus on today as we talk about picture books. Another Wednesday I’ll talk about making books independently accessible, but for today, let’s look at how we can make lap reading the fullest experience possible for our kids.

What “ingredients” make for a meaningful lap reading experience? There are the players…a relaxed adult or older sibling, who is willing to give the time needed for an unrushed reading. The reader should be comfortably enthusiastic and animated, keeping the experience interesting and sharing a sense of delight in stories and books. The child should be ready; those who are hungry or cranky will be more distracted than they will be able to immerse themselves in a great book. Then—and this is such an important point—they need to be positioned so they can see! Some kids have physical challenges that prevent them from sitting up and you may need to ask your physical therapist about the best way to set up for suitable “non-lap” lap reading that still promotes physical bonding.

You also need a book…selecting the perfect read is a topic that could fill many posts! But for now, let’s keep it simple. A great book is one your child will love and that you don’t mind reading repeatedly. Remember, typically developing children beg us to reread the same book until we would prefer to hide the thing both have memorized it by heart, and there is important learning and literacy development that is supported by this repetition. We must give our kids with disabilities the same opportunity to request their favorite titles over and over…and over…  At the same time, kids need access to lots of books, and thankfully libraries are full of them! Great books have stories that we will remember because of their funny words or awe-inspiring pictures or the way they make us laugh or help us understand our world better.

A book read with an adult doesn’t (usually) have to be adapted to withstand the kind of abuse it might receive if a child was reading it independently. Some kids may still need super-strong or drool-protected books, but often adults get pretty good at pulling delicate books out of harm’s way at just in the nick of time. Children with vision impairments will need some adaptations to give the book tactile information. [I promise, I wrote myself a note so I won’t forget to post on these adaptations another time!]

However, if a child is non-verbal, a book will ideally be adapted so he can talk about it with the reader. While a child able to point may respond to questions by touching parts of the pictures that relate to your questions (“Ooooooh, who is sneaking up behind Max?”), it isn’t easy for him to chime in with the story unless it has some kind of symbol support. Also, not every illustration has all the elements needed for a child to be able to use it conversationally. Symbol support helps with this problem. If you need ideas about how to create communication symbols, check out this post.

For young children, it’s quite fine to provide symbols for just the main actions and characters or objects. Don’t worry about representing little words like “the” or “if” with symbols.

I like to attach little squares of soft LOOPy adhesive hook-and-loop tape (hereafter known simply as "Velcro" to reduce otherwise awkward reading, but any brand will work) to the book itself, as close to the word as I can without blocking the picture or text. The reason that we use the LOOP side in the environment is that it is soft to the touch (I promise, you don’t want to brush a bare arm against the scratchy Velcro hook side when it’s mounted on the wall!). We attach the HOOK side to the cards. If you do this consistently across all environments, you will get a lot more use out of your symbol cards (I saw a classroom once where half the symbols had hook-side and others had loopy-side Velcro. Symbol management was a nightmare, to say the least!).

How do we encourage kids to participate in the book reading and discussion using symbols? If there is a repeating line that comes up regularly, they can tap on the cards each time it comes up in the story. Better yet, record it on a BIGmack or similar voice switch and encourage them to chime in with you when the line repeats.

Hook-side Velcro sticks beautifully to inexpensive indoor-outdoor carpet from the local hardware store. Use a square to hold symbol cards as you read. Peel them out of the book as you go along and stick them on the carpet square to retell the story after the book is finished. Scramble up cards from the story and have your child help retell it in the correct order.  


Ask your little reader her opinion about characters and events in the story and let her use the symbols to share her preferences. But do remember, lap reading isn’t about testing…it’s about conversation!!! Keep your questions non-threatening; now isn’t the time for right answers but for ideas and opinions, just as you would expect to talk about books with an adult friend. As children get used to sharing their feedback with you, you will also want to build a set of symbol cards or a board of symbols that allows them to request and comment. You might want to store extra vocabulary that is specific to a certain story right inside the front or back cover (i.e.: “frustrating” isn’t a concept found in enough children’s stories to merit full-time space on most symbol boards, but it might be pertinent enough to a particular story to Velcro a “How frustrating!” card inside the cover for commenting).

While I personally believe every child deserves daily lap reading, as a teacher I realize this doesn’t happen in every home. In schools, we can provide an intimate small group reading experience that comes in a distant second. I’m happy to share ideas to simplify the process if anyone is interested…just let me know!

Enjoy lap reading with your kids this week! The memories you build with your child during these times will bring you both pleasure for years to come.

* * * * * * * * * *

You might also like:
Adapting Books for Physical Access